Welcome!
Welcome to THEOlive! This guide will describe how you can get started with real-time streaming in minutes through the THEOlive management console.
THEOlive allows you to stream video real-time to your viewers, and to get started in minutes instead of days or weeks. Leveraging the High Efficiency Streaming Protocol, THEOlive aims to provide real-time streaming to large audiences, with high quality video, up to HD 1080p.
THEOlive lives by the "API first" mantra: each action can be performed using API calls. Each possible call can be found at our API Reference. However, to make things easier for non-developers, we built a management console on top of these API calls which makes it straightforward to perform the basic actions. To be able to create and use a THEOlive channel, you should register for an account and get a token to perform authenticated requests to our API.
1. Create an account in the management console
To start your journey, you'll have to create a THEOlive account in the management console, which can be found at https://console.theo.live/.
Once you've entered your user name and password, you can already create your first channel and start streaming. There will be a 5-minute streaming cap and a THEOlive watermark in this free environment. To get access to unlimited streaming, you will have to complete your account and credit card details in the 'my account' section. Find more information on How billing works for THEOlive.
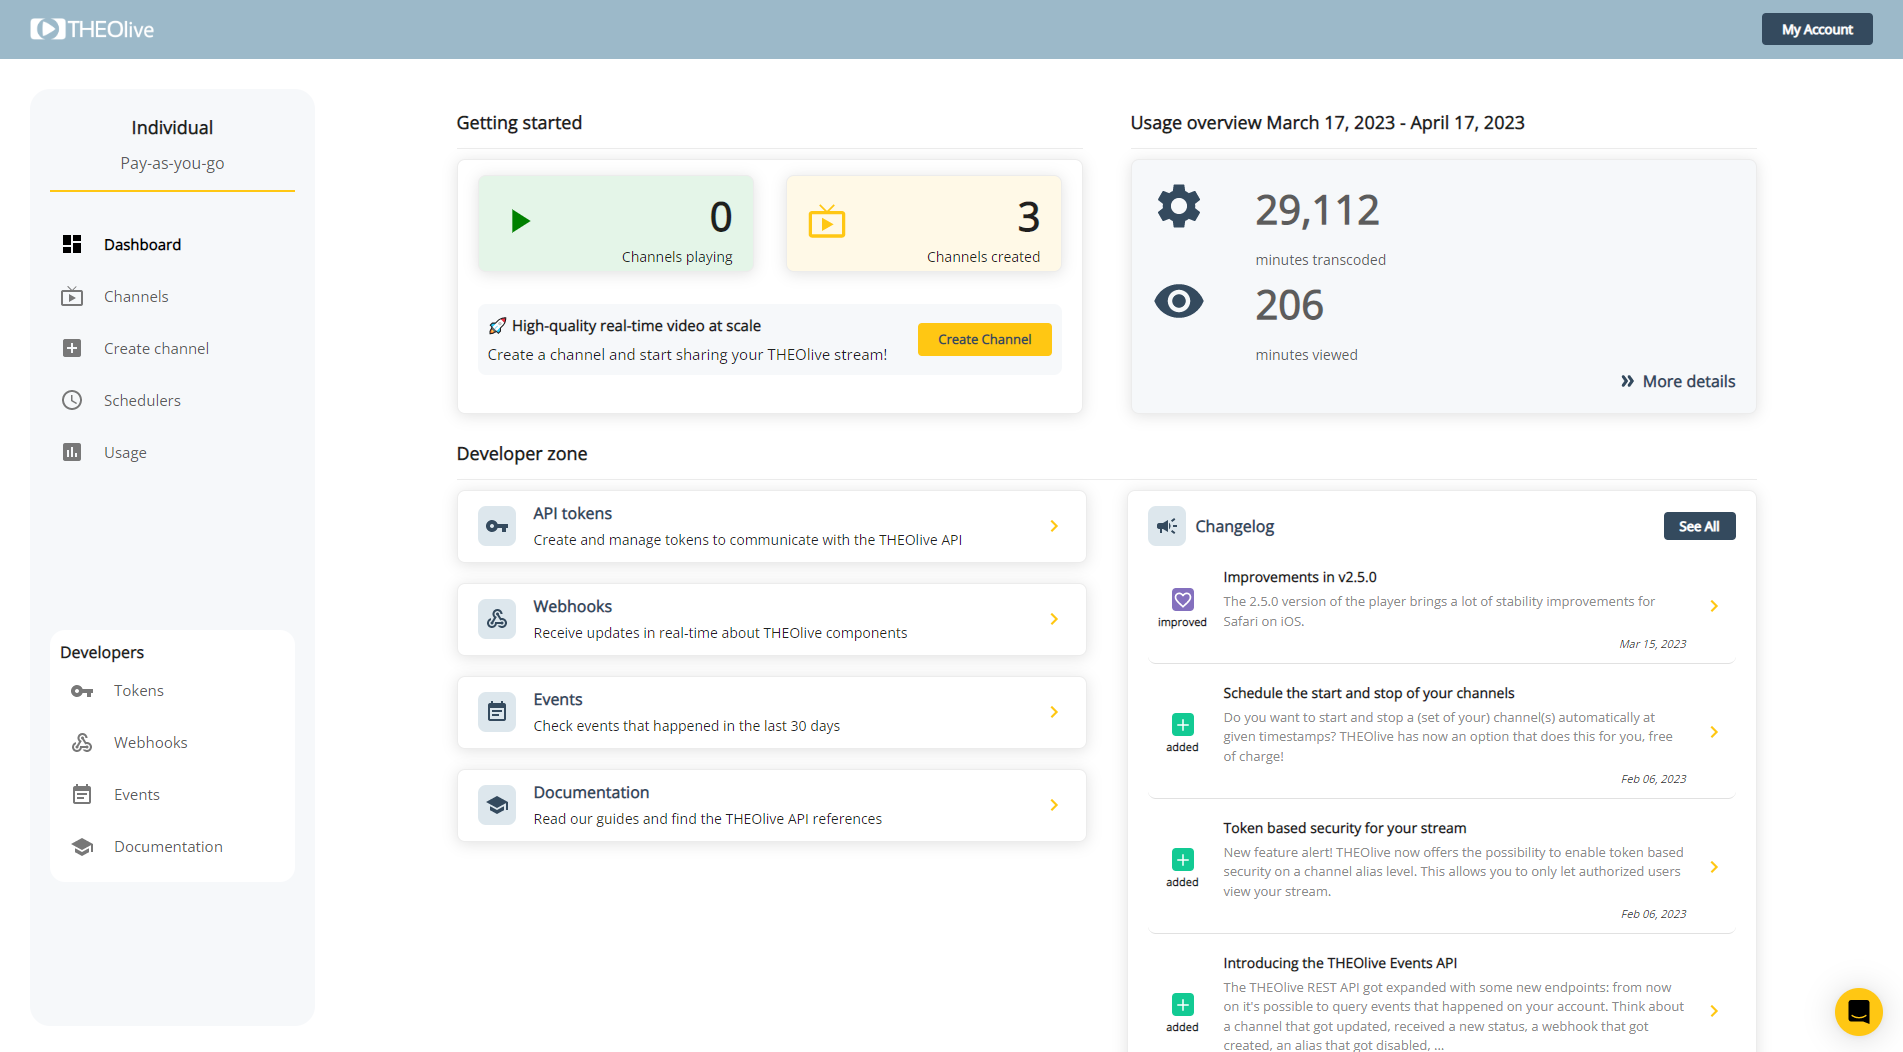
Homepage of the THEOlive management console
API reference
This guide describes how to get started with the THEOlive management console. Please consult the API reference and Authorization if you would like to work with API calls. There is also a guide Using Postman with THEOlive which describes how to use Postman for THEOlive API calls.
2. Create your first channel
Time to start streaming! In the management console, please click "create channel", which will return the following screen: here you can enter a name for your channel, choose the ingest location, and define your Stream configuration. It is important to choose a location as close as possible to you to reduce latency. An overview of possible ingest locations can be found here.
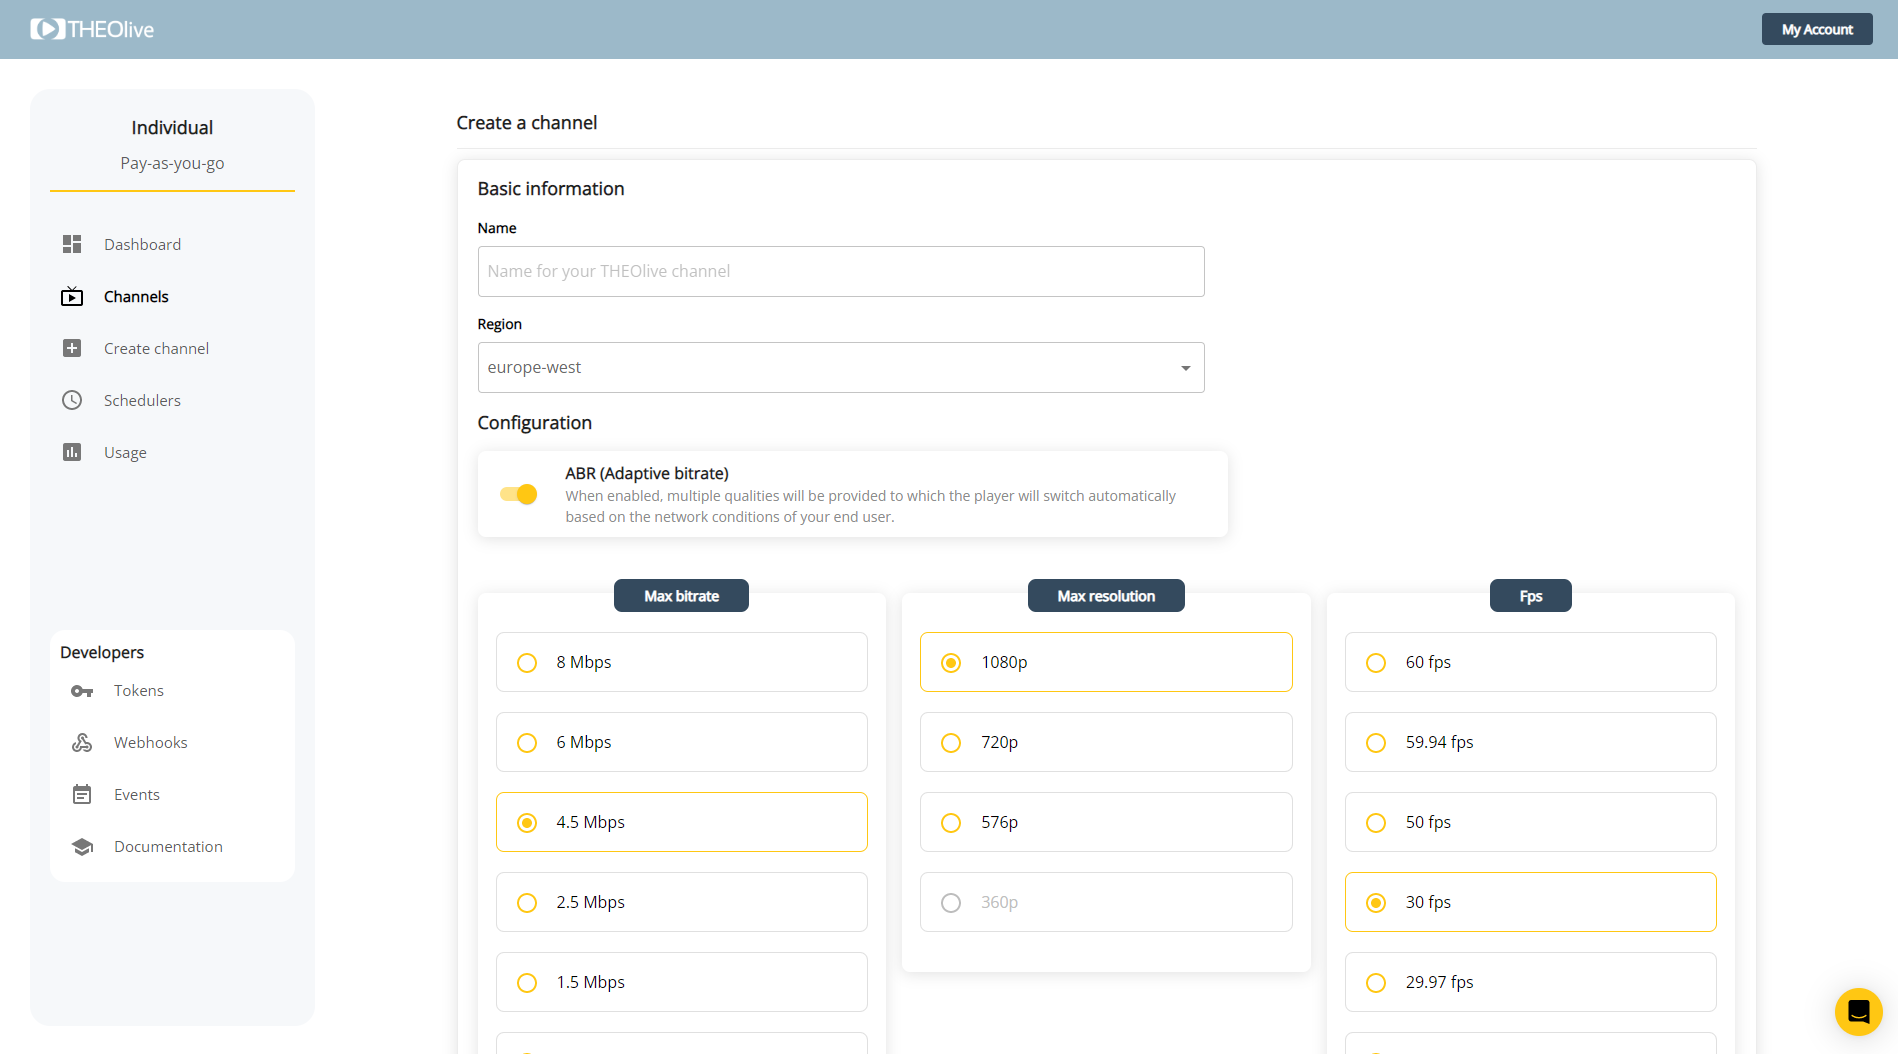
Creating a channel
When hitting 'Create', you will be navigated towards the Details page of your newly created channel.
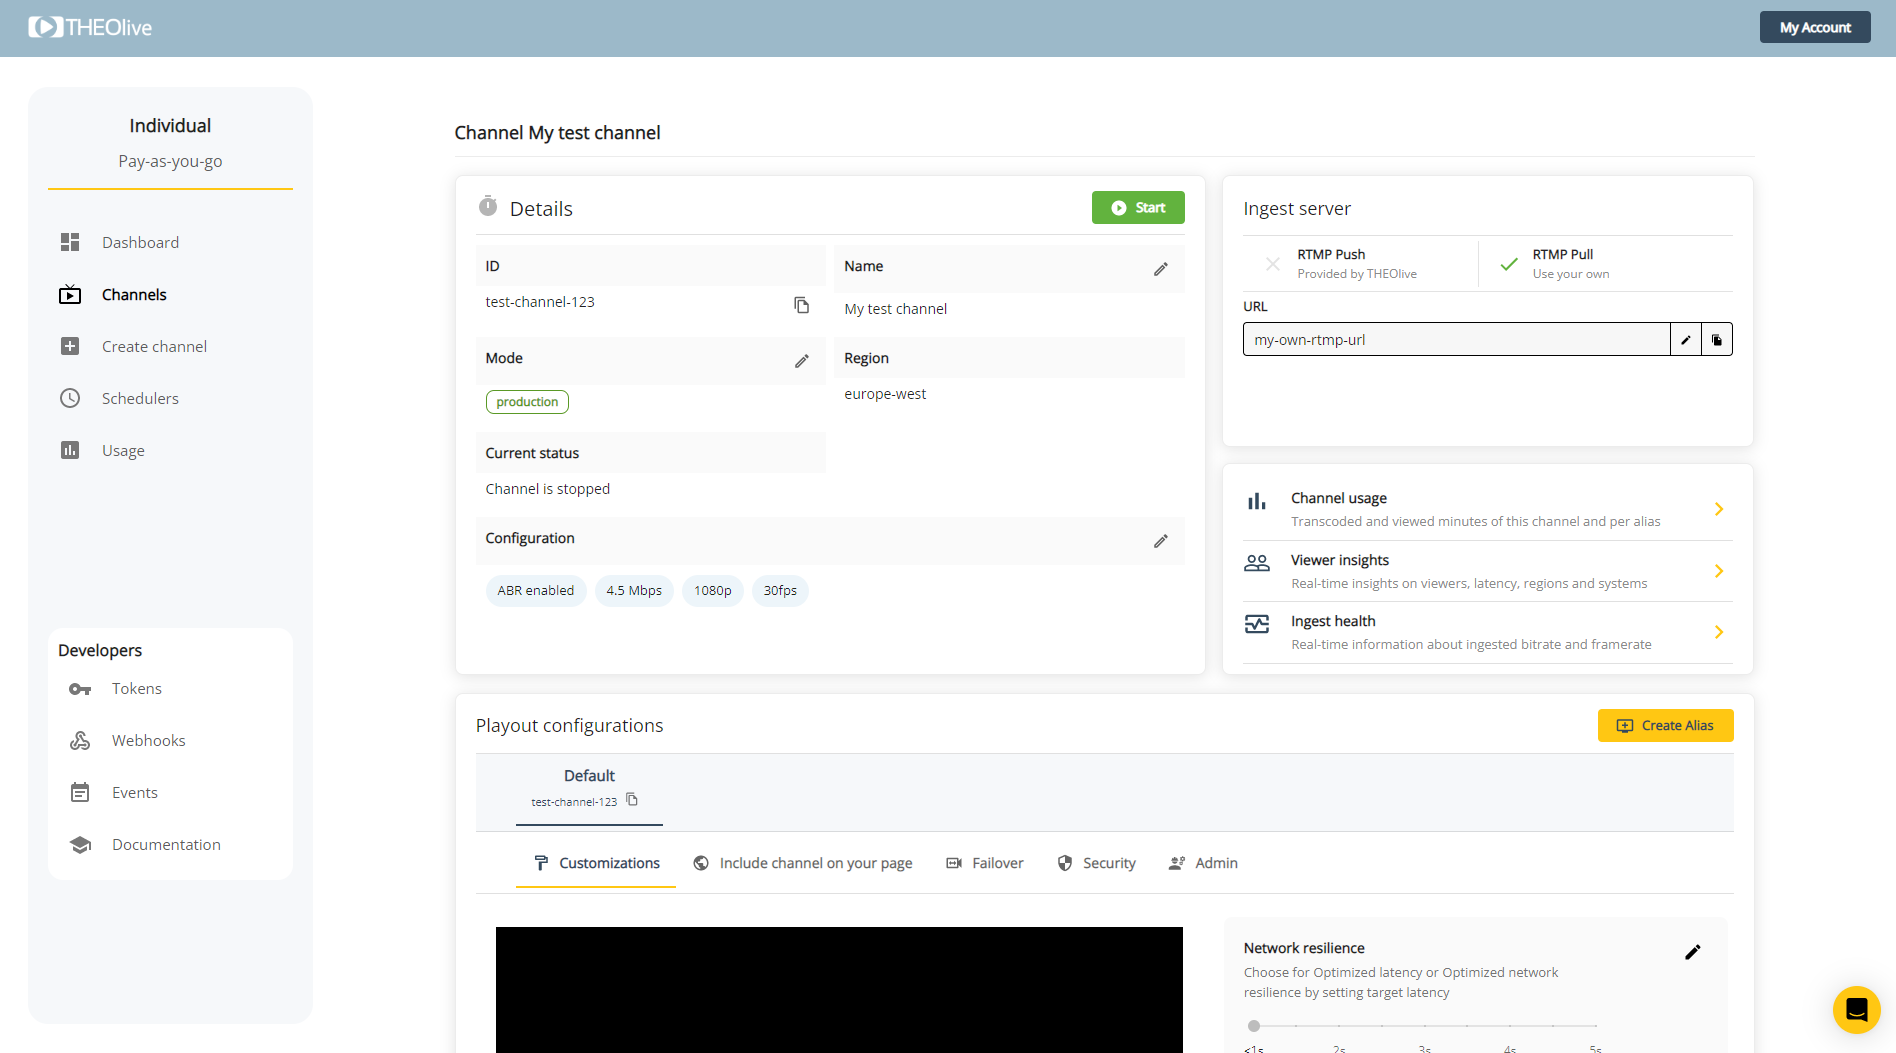
Management console: Details page with the possibility to start your channel and options to customize your player.
A channel can also be created through an API call to the channels endpoint, passing an ingest location and a name. It will return an id that you can use to start, stop, update or delete the channel later on. Also, a streamKey and rtmpPushUrl will be returned to stream your content to. More information about the Create channel endpoint and how to pass advanced properties can be found here.
curl --location --request POST 'https://api.theo.live/channels'
--header 'Authorization: Basic dG9rZW46c2VjcmV0' \
--header 'Content-Type: application/json' \
--data-raw '{
    "ingestLocation": "europe-west",
    "metadata": {
        "name": "a-name"
    }
}'
Note that for this API call you'll need a token that you can generate in the management console. More information can be found at the Authorization guide.
3. Start streaming
Using the RTMP push URL and the stream key you have received when creating a channel, you can start streaming content to that RTMP endpoint.
RTMP pull
If you would like to do pull-based streaming instead of push-based streaming, you can also use your own RTMP pull endpoint and specify this when starting the channel in the next step.
One option to start streaming content is making use of OBS. It's an easy, free and quick way to get you started. More information on how to get started with OBS can be found in our guide Using OBS with THEOlive. If you would be using Wirecast for your live streaming, then more information on how to get started can be found in the guide Using Wirecast with THEOlive. There are also guides for vMix and Videon Edgecaster.
RTMPS vs RTMP
The RTMP push URL generated by THEOlive shows as RTMPS. If you would like to do RTMP streaming then you will have to change "rtmps" to "rtmp". As an example rtmps://rtmp.europe-west.theo.live/live will have to be changed to rtmp://rtmp.europe-west.theo.live/live for RTMP-based streaming.
4. Player embed script
Now we have to make sure that our viewers have access to the stream! Including a THEOlive channel on your page is very simple: all you need is our embed script and the channel ID. The Player guide gives more information on how to do this, including a code snippet example.
5. Start the channel
When you're all set, you can start your THEOlive channel. Starting your channel also means your transcoding time will start counting for billing purposes.
You can easily start your channel on the channel details page, by clicking on the green "start" button.
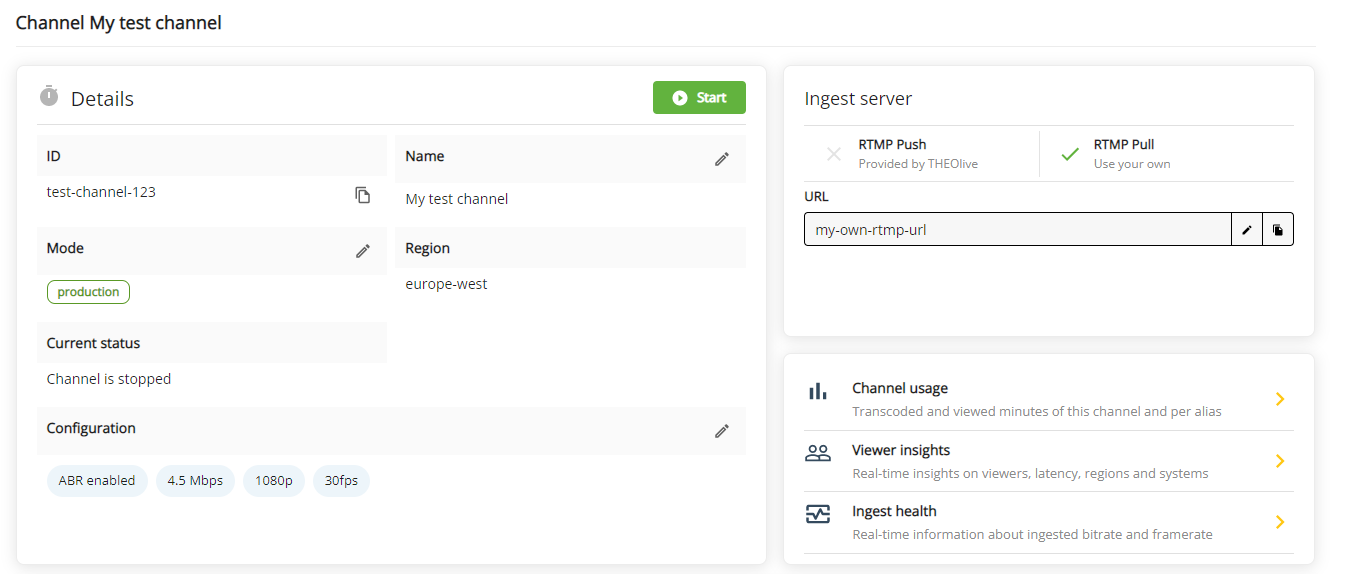
Start the channel with the green button
In the background this will make a POST request to the channels/start endpoint. You can also start a channel via the Start channel API call, for which you can find more information here. As mentioned in the last section, you can optionally pass the rtmpPullUrl property in the body of the request for pull-based streaming. Don't forget to stop streaming when you are done!
curl --location --request POST 'https://api.theo.live/channels/{channel-id}/start' \
--header 'Authorization: Basic dG9rZW46c2VjcmV0' \
--header 'Content-Type: application/json' \
--data-raw '{
    "rtmpPullUrl": "your-optional-rtmp-pull-url"
}'
6. Stop the channel
Have you finished your real-time streaming? Make sure to stop your channel by making a request to the channels/stop endpoint, either through a Stop channel API call or by pressing the red "stop" button in the management console.
curl --location --request POST 'https://api.theo.live/channels/{channel-id}/stop' \
--header 'Authorization: Basic dG9rZW46c2VjcmV0' \
--header 'Content-Type: application/json'
Updated about 2 years ago